Yamaha SU700 encoder repair and replacement
Yamaha SU700 encoder repair and replacement
The problem...
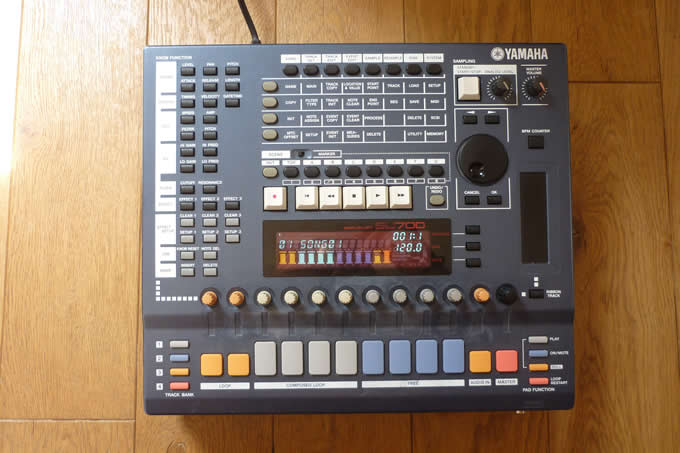
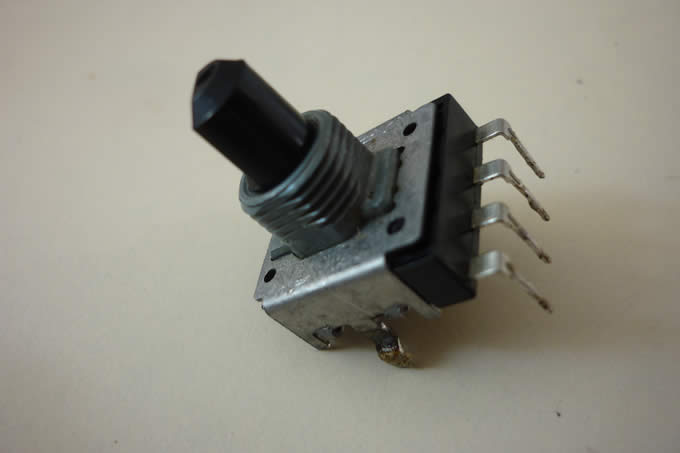
I love my old SU700 sampler, but this machine has an Achilles' heel. The rotary encoders used to change practically every parameter of every track are notoriously prone to jumpy erratic behaviour, sometimes ignoring all movements, sometimes bouncing between extremes at the slightest touch. The culprit is shown below - Yamaha part number VU 594400, aka Panasonic part number EVQ-VBK-F01-24B
The solution...
I've tried various things over the years to get them to behave. Initially I checked for physical problems like broken solder joints or loose casings, but there was never any improvement. I've applied all manner of contact cleaners, deoxidisers and switch lubricants, some of which have been very effective in the short term, but all of which have worn off within a few days. I finally decided that there were only two things left to try: repair or replacement.
SU700 encoder repair
I decided to try repairing the encoders first, since they are not easily or cheaply obtainable components and my approach is always try to fix something before you spend money replacing it. With that in mind, I disassembled the SU700 and removed the circuit board for the front panel. I decided to try repairing one of the encoders that was worst behaved and least used, so that if it all went wrong, I wouldn't be much worse off. The encoders are well soldered on but the pins are large and it's an easy job with a soldering iron and a de-soldering pump or wick to remove the old solder and free the component.
Once freed, the encoder can be dismantled by carefully prying up the four metal hooks at the base of the component that are bent over the black plastic. The two halves of the encoder can then be separated, revealing the rotor and contacts.
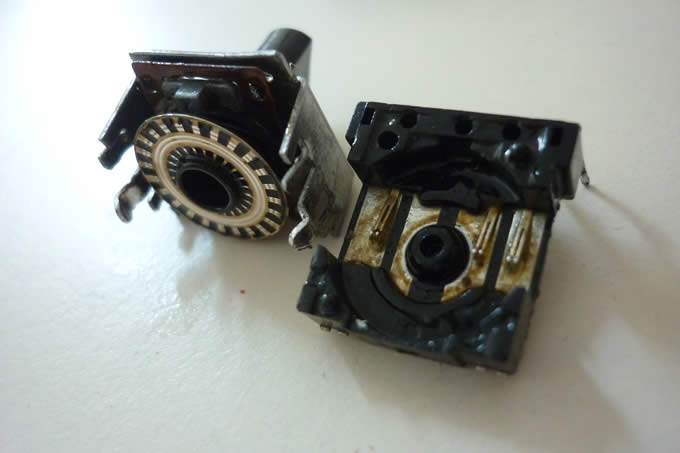
As you can see, mine contained a lot of gunk. I washed it out with solvent and then took a close look at the state of the contacts. The rotor wheel was scored and worn from thousands of rotations and the detents were enlarged, meaning the contacts were not being triggered as cleanly as they should. I also noticed that the contact for one of the channels was bent down, increasing the possibility of missed or conflicting movements. Either of these could be enough to cause the issues I was seeing, but the damage to the rotor could not easily be repaired. So I realigned the contacts, reassembled the encoder, and tacked it back in place on the motherboard to test if a clean and tweak was enough to stabilise the jumpy response.
The encoder's feel was much improved, with a noticeable distinction between each detent or click of the rotor, and there seemed less play in the shaft, perhaps because of the reassembly taking up some slack that had developed over time. However it quickly became clear that the unpredictable jumpiness had not been completely overcome. The encoder was hugely improved, but still not stable enough for regular use.
SU700 encoder replacement
So that meant I would have to try to replace them. The original Panasonic part is no longer made, and so has become quite scarce. It is apparently possible to source the original encoders in the UK from Yamaha themselves, for £4.24 each plus postage. This seemed like a good option but as I would need to replace all twelve encoders, it looked like being an expensive repair. So I decided to do a little research and see if there was an off-the-shelf part that could do the same job, firstly to keep costs down and secondly to avoid reliance on an obsolete and hard-to-find part that has already been proven to be prone to failure.
To begin with I needed to know the proper spec of the encoder I wanted to replace. Some digging around led me to some of the modern Panasonic rotary encoders' datasheets, which use the same naming convention as the old part. From this I could deduce that EVQ-VBK-F01-24B has 24 pulses per revolution. A quick spin of the encoder hooked up to a multimeter in continuity mode confirmed this. NB: my attempt at repairing the encoder had an added bonus, as revealing the internal contact layout allowed me to identify the pinout of the VU 594400, and to confirm that one pin of four has no contact and is unused.
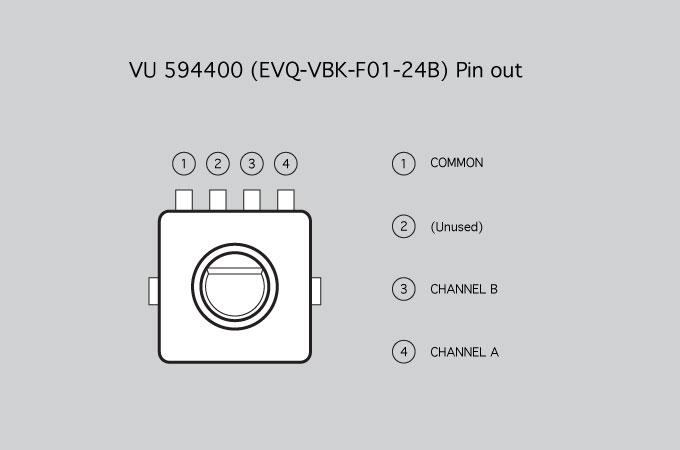
Therefore we can spec the old encoders as:
- 14-15mm square mechanical incremental rotary encoder
- 2 channel / 24 detents / 24 pulses per revolution
- 19-20mm in height from circuit board to end of shaft
- 6mm diameter D shaft
- 4 pin
Finding alternative four pin encoders is practically impossible - the industry standard for such components appears to have settled on three pins arranged with the common signal on the middle pin. Nor could I find any that matched the dimensions of the original. 12mm seems the most common width. However, the electrical specs of the old encoders were replicated in several current components. So in the spirit of experimentation, I ordered the three that seemed to match most closely, and set out to test them.
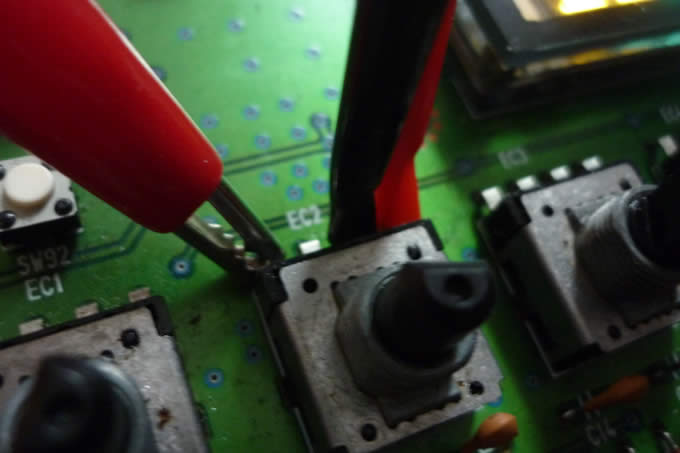
I hooked into one of the old encoders using hook clip probes and crocodile clips, as shown in the photo above. Then I connected up the probe leads to the pins of one of the new test components and fired up the SU700 to test if the levels responded to rotation of the new encoder. The test showed good reaction but in the opposite direction, so a quick switch of the channel pin leads and the encoder was recreating the original's movement perfectly, without any of the erratic behaviour it had developed over time. Score 1 for experimentation. But could they be made to fit in place of the originals without major surgery?
To find out I de-soldered the old refurbished encoder again, and tried out each of the new parts to see how they lined up, both in terms of physical alignment with the other control shafts, and also how the electrical and support pins could be made to match up with the circuit board. Luckily, the support pins, once bent out slightly, lined up well with the holes in the board, but the contact pins were way out. So I bent them upwards to clear the board entirely, and push fitted the encoder into the support holes. The shafts seemed to line up well by eye, but I replaced the board in the top cover to be absolutely sure. Happily, the new encoder sits perfectly in place. Comparing the old and new, it appears that the support pins on both are vertically centred on the shaft rather than the body of the component itself, meaning that the shaft should always be in the same place regardless of variations in body. So then it was just a matter of rerouting the contact pins to the correct point on the board, which I ended up achieving with small jumper wires soldered to the bent pins.
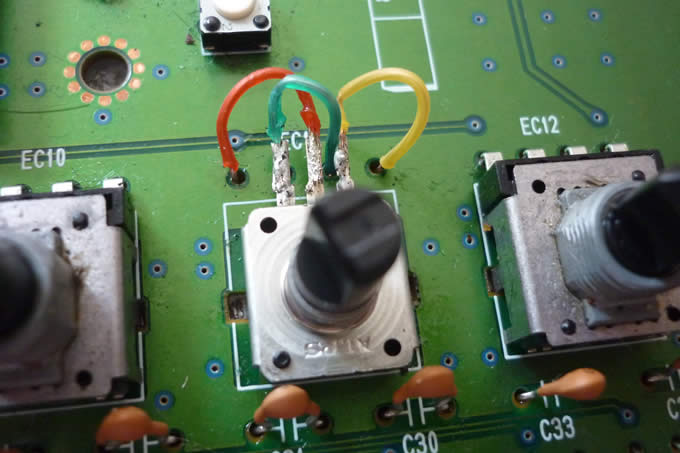
Tested components:
Alps EC12E24404A8
Available at RS, Farnell and most other online suppliers. This encoder has no bushing, no switch and a slightly softer feel - less force is needed to overcome the detents, and so the spin is smoother. This seemed to me to match the feel of the original most closely, but as these old parts have become worn, their current feel may not be as originally intended. This was the cheapest of the three I tested.
Alps EC12E2420802
Available at RS, Farnell and most other online suppliers. This encoder has a bushing that matches the original, no switch and a slightly harder feel - more force is needed to overcome the detents, and so each individual click feels very distinct. Some may prefer this more precise feedback. This was more than twice the cost of softer Alps above, but still only around £1 each.
Bourns PEC12R4220FS0024
Available at RS and some other online suppliers. This encoder has no bushing, a slightly harder feel like the second Alps encoder, and a momentary switch, closed by pushing down on the shaft. I wanted to try another manufacturer, and Bourns has a good reputation for quality, and is a pro audio supplier. This was priced between the two Alps encoders.
SU700 mods/hacks
The addition of a switch started me thinking of ways to expand the controls beyond those of the original SU700. For example, by wiring in the switch to both the ON/MUTE button and the individual track pad, it should be possible to toggle the mute status of each track by pushing the encoders, avoiding a button press and allowing the hand to remain on the encoder for level changes. Or by doing the same for ROLL you could rotate the encoder to fade up the filter cutoff whilst holding it down to roll the sample. I have tested using the encoder switch to control various switches nearby, but by combining several into one switch, the possibilities are huge.
