Replacing the screen of a Panasonic Lumix FS62 digital camera
Replacing the screen of a Panasonic Lumix FS62 digital camera
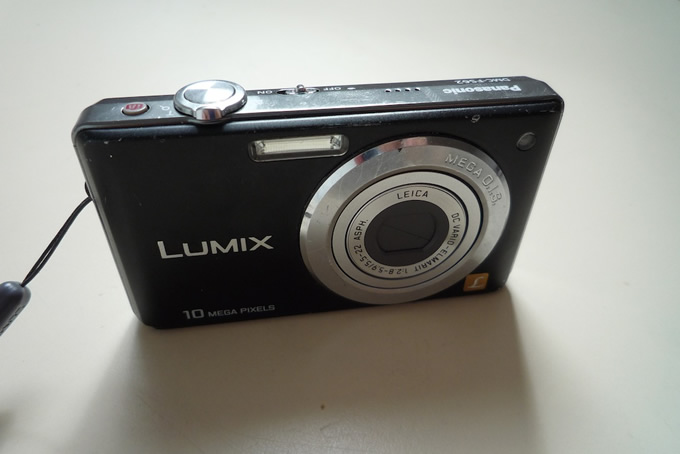
I recently had to replace the LCD screen on my Lumix after the display became unusable, due to a crack running across the screen, so I thought I'd record the process for anyone with a similar problem. Please note I take no responsibility for your incompetence should you mess this up - if you don't have the necessary technical skills - don't do it.
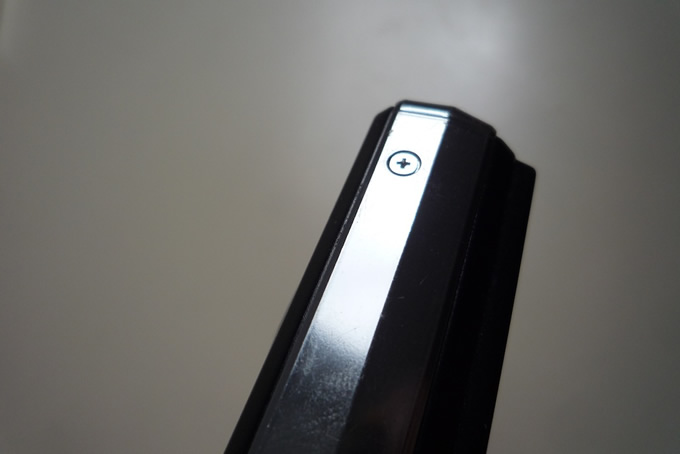
Step 1: Remove screw 1
Screw 1 is a single screw on the left-hand side when holding the camera with the screen towards you in landscape orientation.
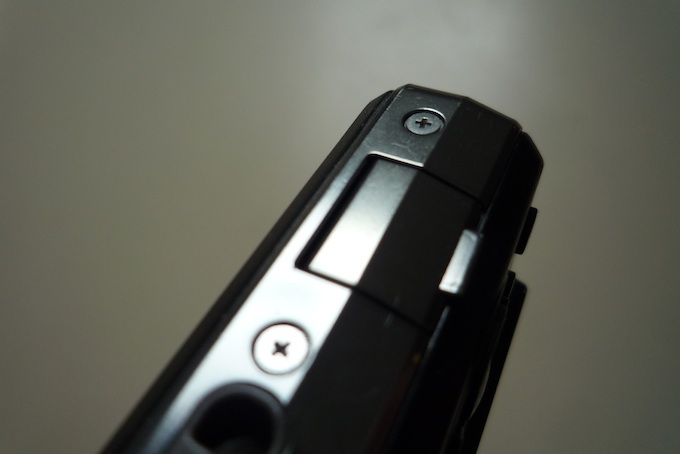
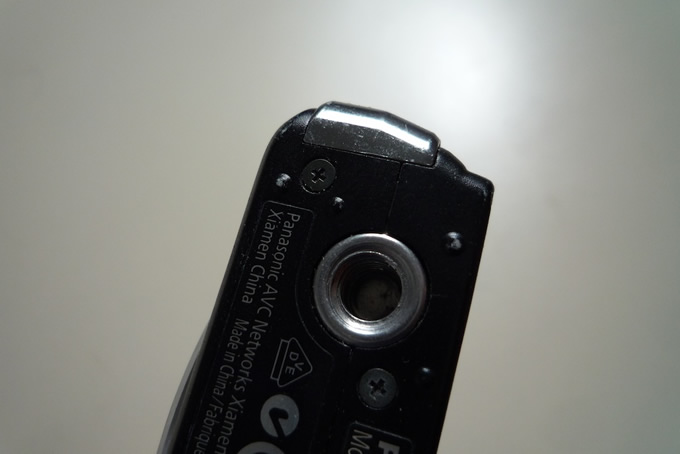
Step 2: Remove screws 2 and 3
Screws 2 and 3 are on the right-hand side next to the wrist strap and port cover.
Step 3: Remove screws 4 and 5
Screws 4 and 5 are on the bottom of the camera either side of the tripod mount.
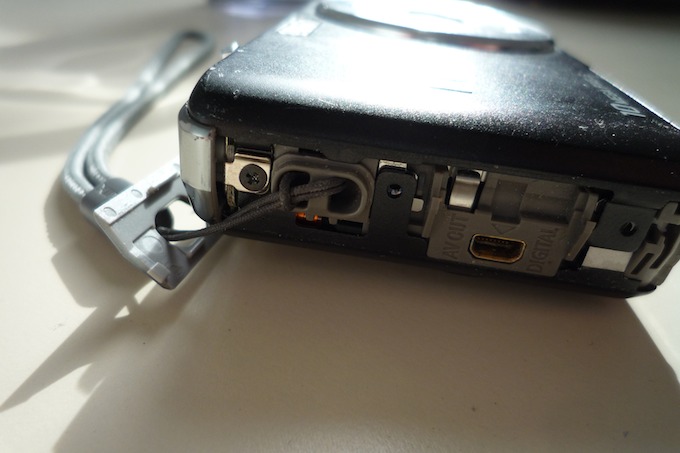
Step 4: Remove screw 6
Screw 6 is hidden beneath the side strip that is held in place by screws 2 and 3. Gently pry this metallic plastic strip up from the bottom near the battery cover - screw 6 is near the top.
Step 5: Remove rear casing
Once all the screws have been removed the rear metal casing can be gently pried off. It is a very snug fit so persistence is required.
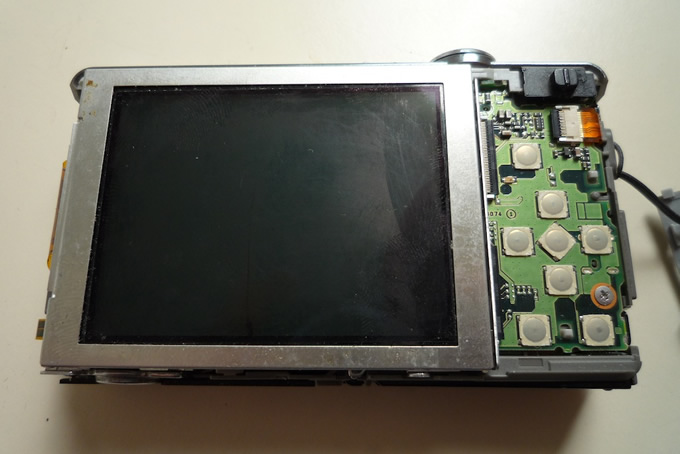
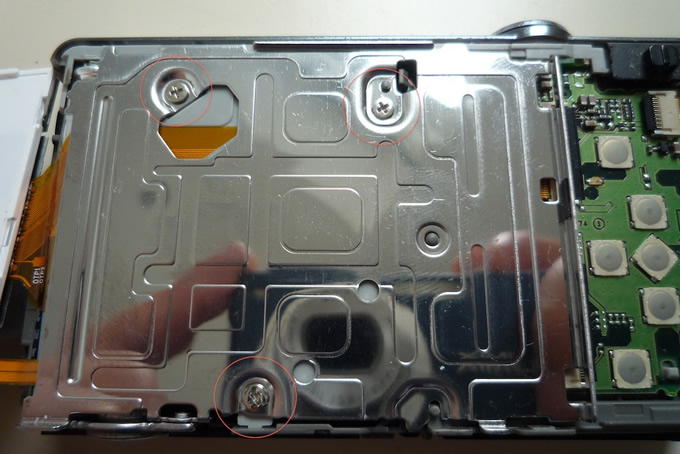
Step 6: Lift screen and remove screws holding metal plate
With the metal casing removed, the screen unit can now be gently unclipped from the metal plate that holds it. At this point it is still held by the ribbon cable so very gently unclip the screen and backlight unit, and flip it over on its left edge so the metal plate below is revealed. Remove the three screws marked, and then lift off the metal plate to reveal the circuit board.
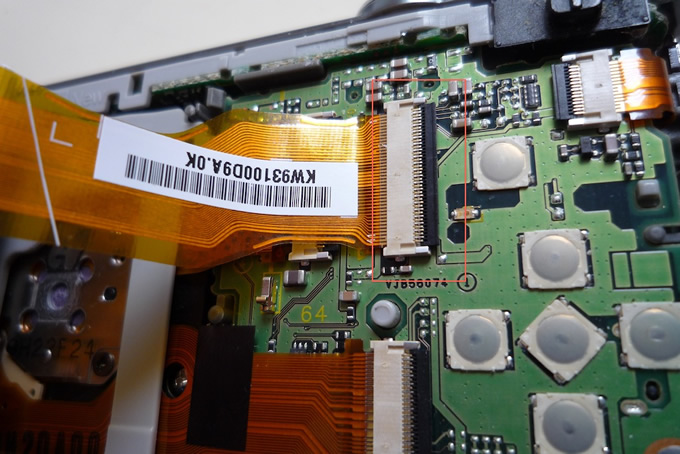
Step 7: Disconnect display ribbon cable
Locate where the display ribbon cable meets the circuit board - it's the vertical connector shown below. Using a small screwdriver, fingernail or plastic spudger, flip up the black bar opposite where the ribbon cable enters the connector. The ribbon cable will now be loose and can be gently pulled to the left and out of the connector, freeing the display unit.
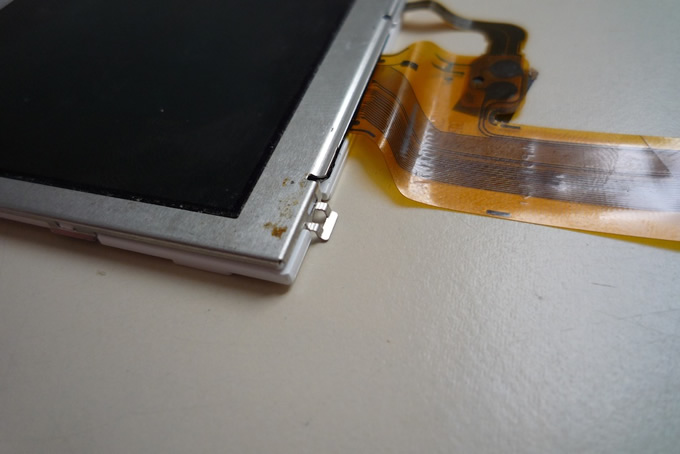
Step 8: Unclip the metal screen holder
Unclip the metal screen holder which is held by small clips as shown.
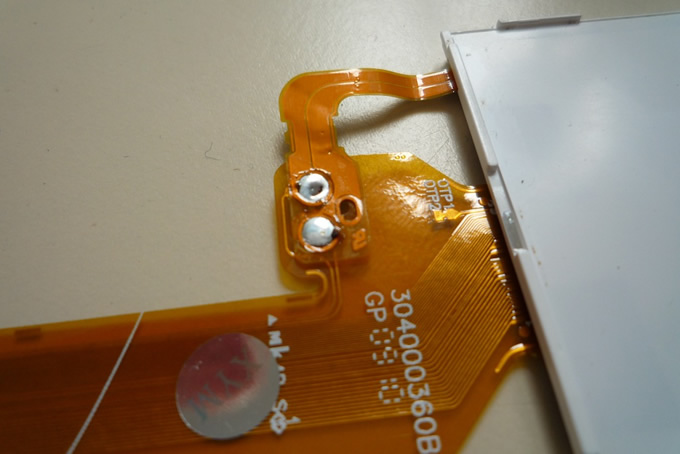
Step 9: De-solder the LCD ribbon from the backlight ribbon
This is the hardest part of the procedure. The two parts of the display - the LCD and the backlight - share a single connector, and are soldered together at the point shown below. In order to safely separate them, you'll need a good soldering iron and some de-soldering wick or a de-soldering pump. Gently heat the solder point until the solder begins to run, then wick or pump it away until the two ribbon cables can be separated.
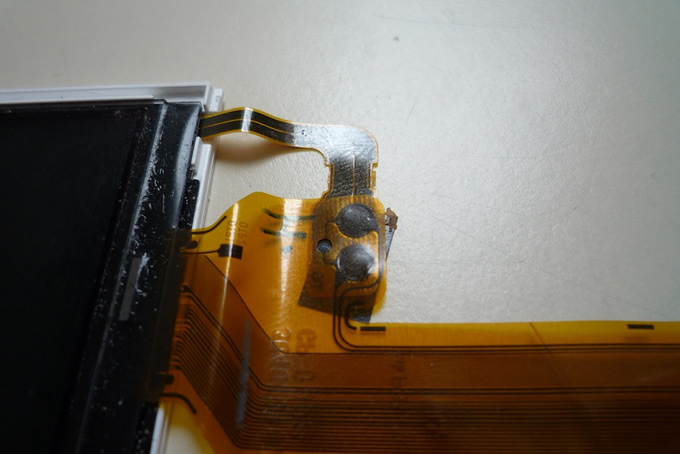
Once de-soldered, the old broken LCD screen can be recycled.
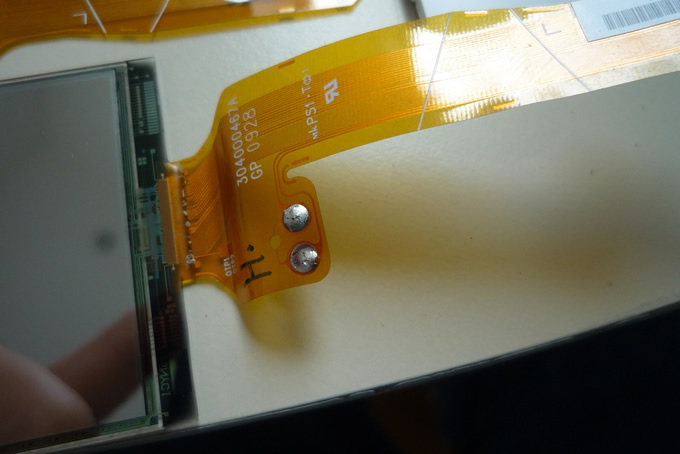
Step 10: Re-solder the ribbon cables
Clip or tape the new LCD ribbon in place under the backlight cable, and apply some flux. Heat the area very gently with the soldering iron, apply solder and join the cables together. Then reconnect the ribbon cable to the circuit board and test the connection by powering up the camera. Once tested, reassemble as per the previous steps.